Overview
In this tutorial we will walk through the process of installing the Java 1.8 and Java 9 JDKs in Windows for Java development. When we're done, we'll have both JDKs installed, with one of them set up as our default leaving us with a Java development environment ready to compile and run applications.
Download the JDK 1.8 Installer
For this example we will install Java 1.8 and Java 9 in order to show how to manage two versions at once. Java 9 is the latest right now, but NetBeans and some other tools require Java 1.8. If you only want to install one version, I recommend using 1.8 for now.
Search for Java 1.8 JDK and Java 9 JDK or go directly to www.oracle.com/technetwork/java/javase/downloads/index.html
Make sure you download the JDK and not the JRE. The JRE is only the Java Runtime Environment which is all you need as an end-user to run programs, but does not include the compiler and developer tools. The JDK is the Java Development Kit and needed for compiling. The JDK also includes the JRE, so there is no need to download both the JDK and JRE separately.
On the download page, accept the license by clicking the radio button and download the relevant version, Windows x64 for most people.
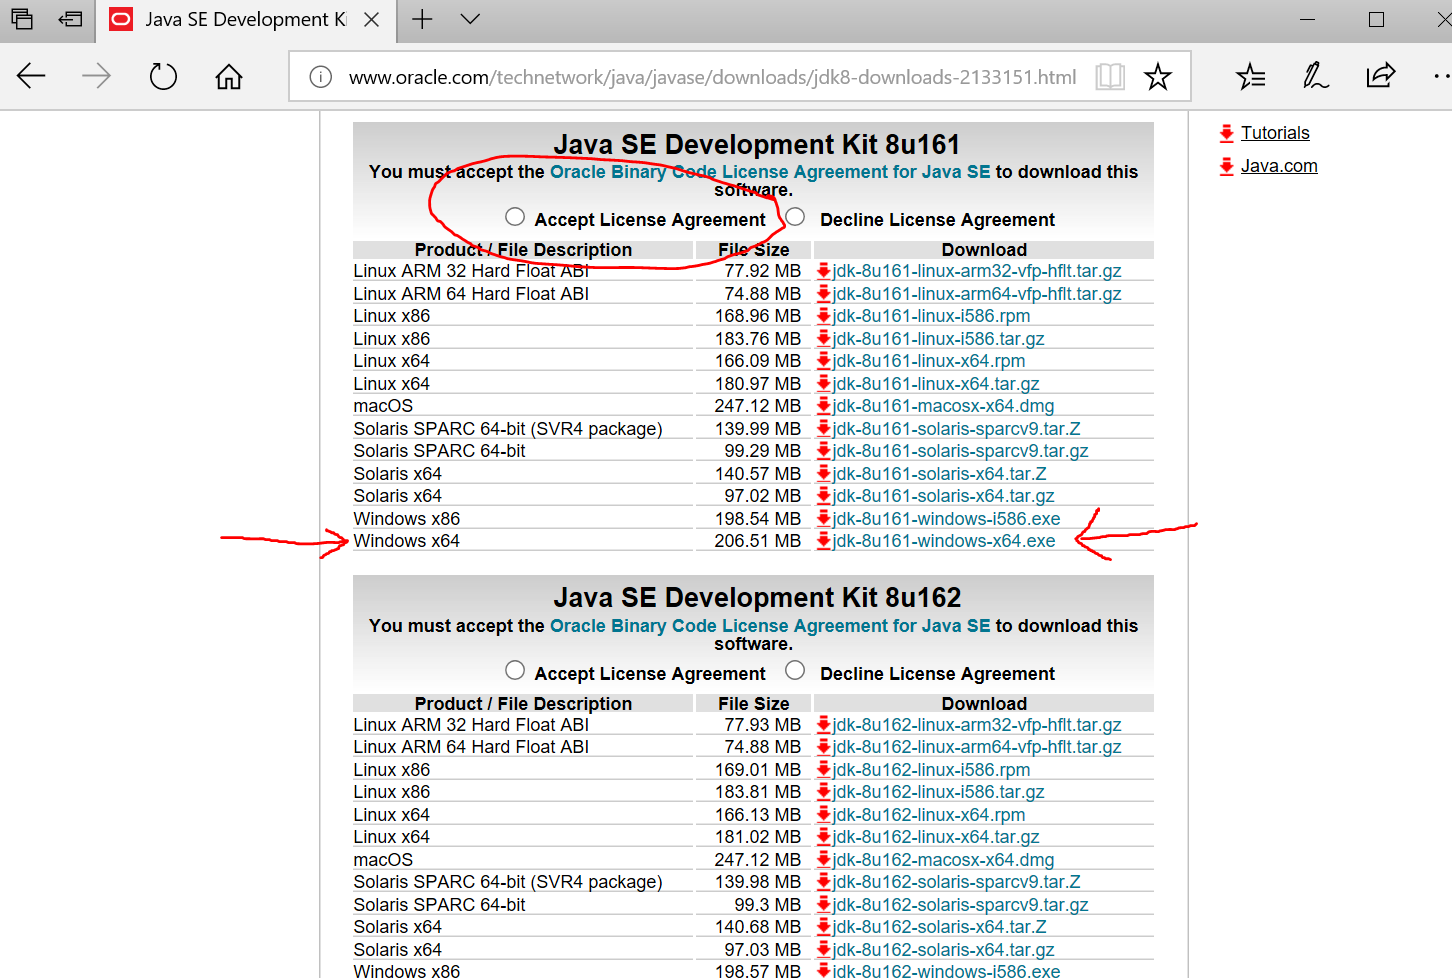
Download the JDK 1.8 Demos and Samples (Optional)
If you want to download demos and sample code, scroll down on the page and download the demos that go with the JDK you downloaded. I highly recommend getting these. It is full of great code examples you can use as reference material, and precompiled programs ready to run. The demos are not installed, but come in a zip file of standalone Java source code examples. I'm going to download them and show you how to compile and run one of them to make sure everything is working.
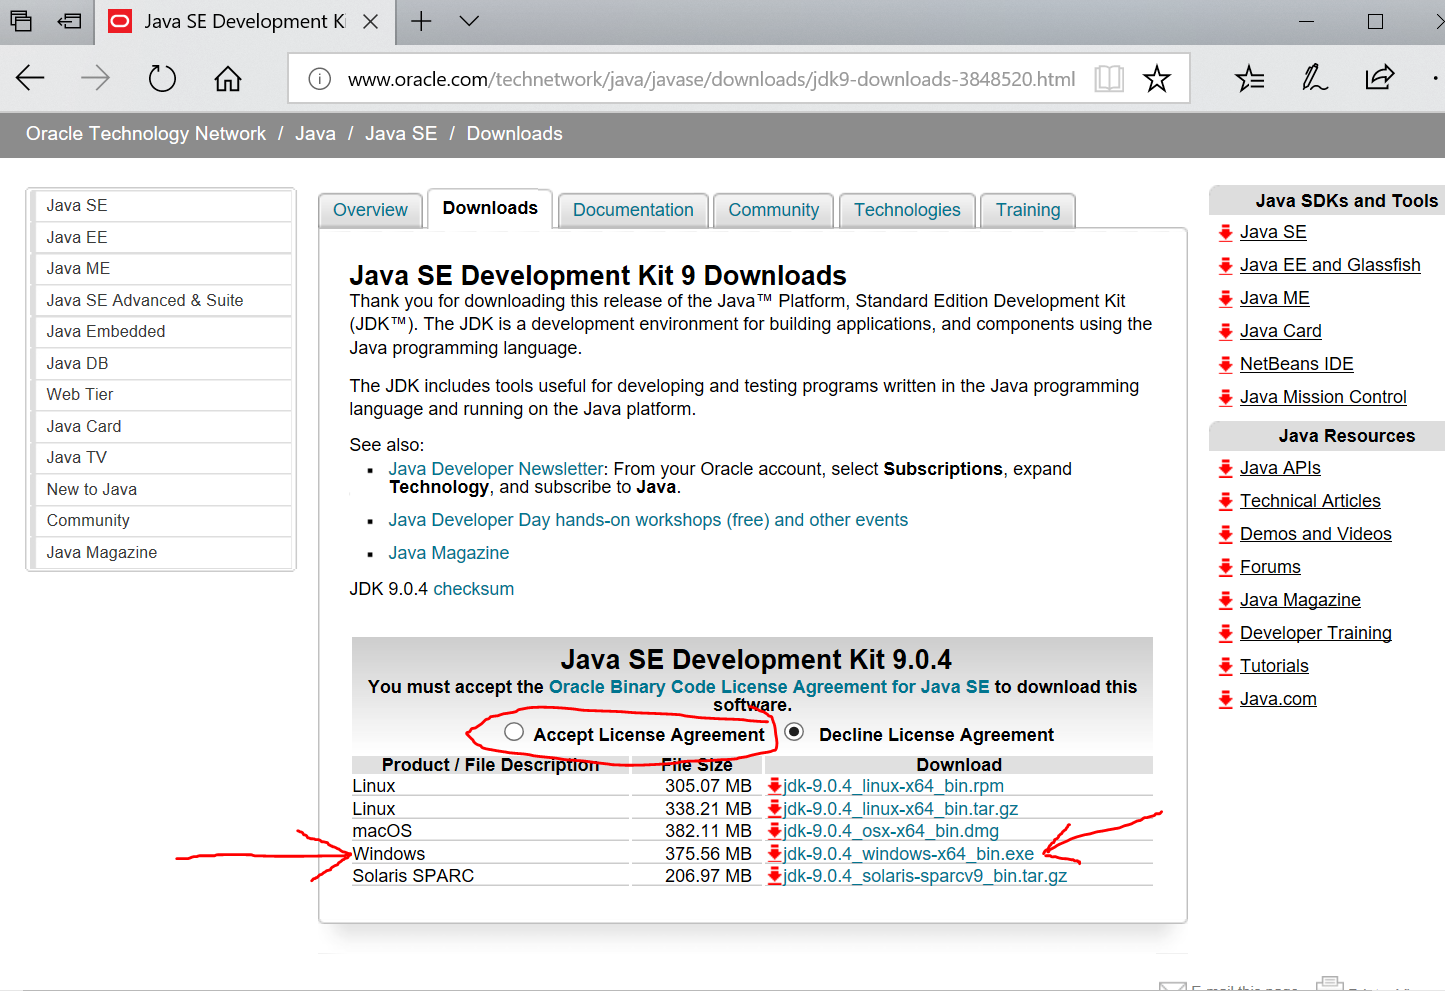
Download JDK 9 Installer
Follow the same steps to download the Java 9 JDK.
Install the JDKs
After downloading, simply locate your downloaded files, and double click them to run the installer.
I choose to install 1.8 first, and then 9. You can go through both installers with all of the default settings unless you want to customize it.
The first Java installed will add itself to your PATH environment variable, which allows you to open the command prompt and start using the java command line executable. It will also configure files with the .jar extension to be runnable by double clicking them. The second JDK will override and take over as the system default until the PATH is changed.
Modifying the PATH Environment Variable
Press Windows key and search for "environment" and you should see the result for editing environment variables.

Follow that link to open the system properties window. From here find the Environment Variables button in the bottom right.
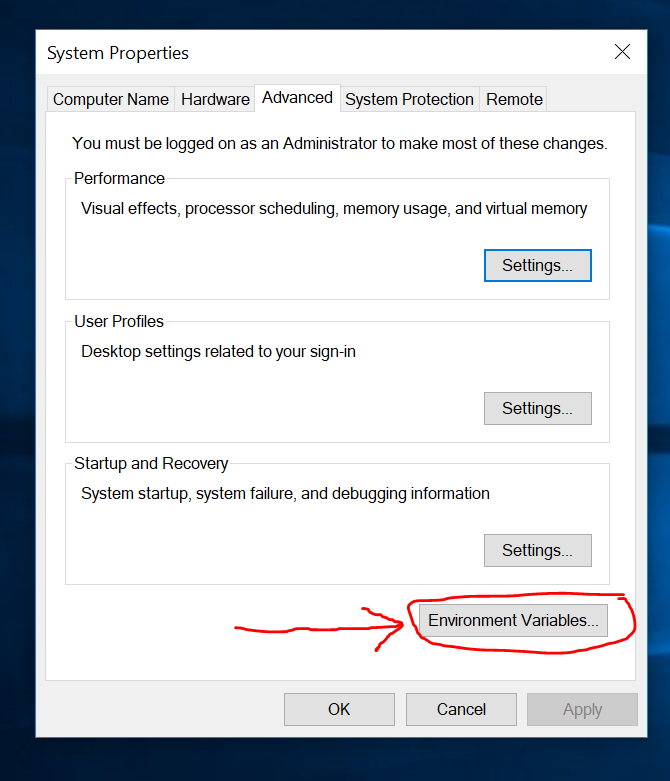
From here you can change your PATH variables. Note that there is one for the system at the bottom, and one for your user at the top. The system PATH should have an entry for Java that the installer left. Simply change this path to point to your preferred JDK bin directory. For example:
C:\Program Files\Java\jdk1.8.0_161\binAfter updating the PATH to point to the correct JDK bin directory, open a command prompt and type the following commands to verify everything:
java -version
javac -version
where java
where javac
Hello World
To write and compile your own simple program, open Notepad and type out the following code:
class Hi {
	public static void main(Strings[] args) {
		System.out.println("Hello, world!");
	}
}
Save it as Hi.java on the desktop. Alternatively, directly download the file Hi.java.
Hold shift, right-click the desktop, and choose Open PowerShell window here. Then run:
# Compile .java to .class file
javac Hi.java

# Run the compiled .class file
java Hi
The output should say "Hello, world". Congratulations, you have a basic Java development environment ready to go.
Install an IDE
NetBeans, IntelliJ IDEA, Eclipse all viable, so is vim, notepad, visual studio code, and atom. If you are unsure, I recommend NetBeans. It is cross-platform and free. You can find it at https://netbeans.org. The next tutorial will cover installing and configuring NetBeans with some configuration and plugin tips. I recommend learning NetBeans because it is also good for other languages, and provides a platform for you to extend NetBeans with your own plugins or write your own applications using the platform.